
Shadia Bead embroidery
by Basma Alamoudi @basma_k_almoudi
- 97
- 0
- 0
Introduction
Introduction
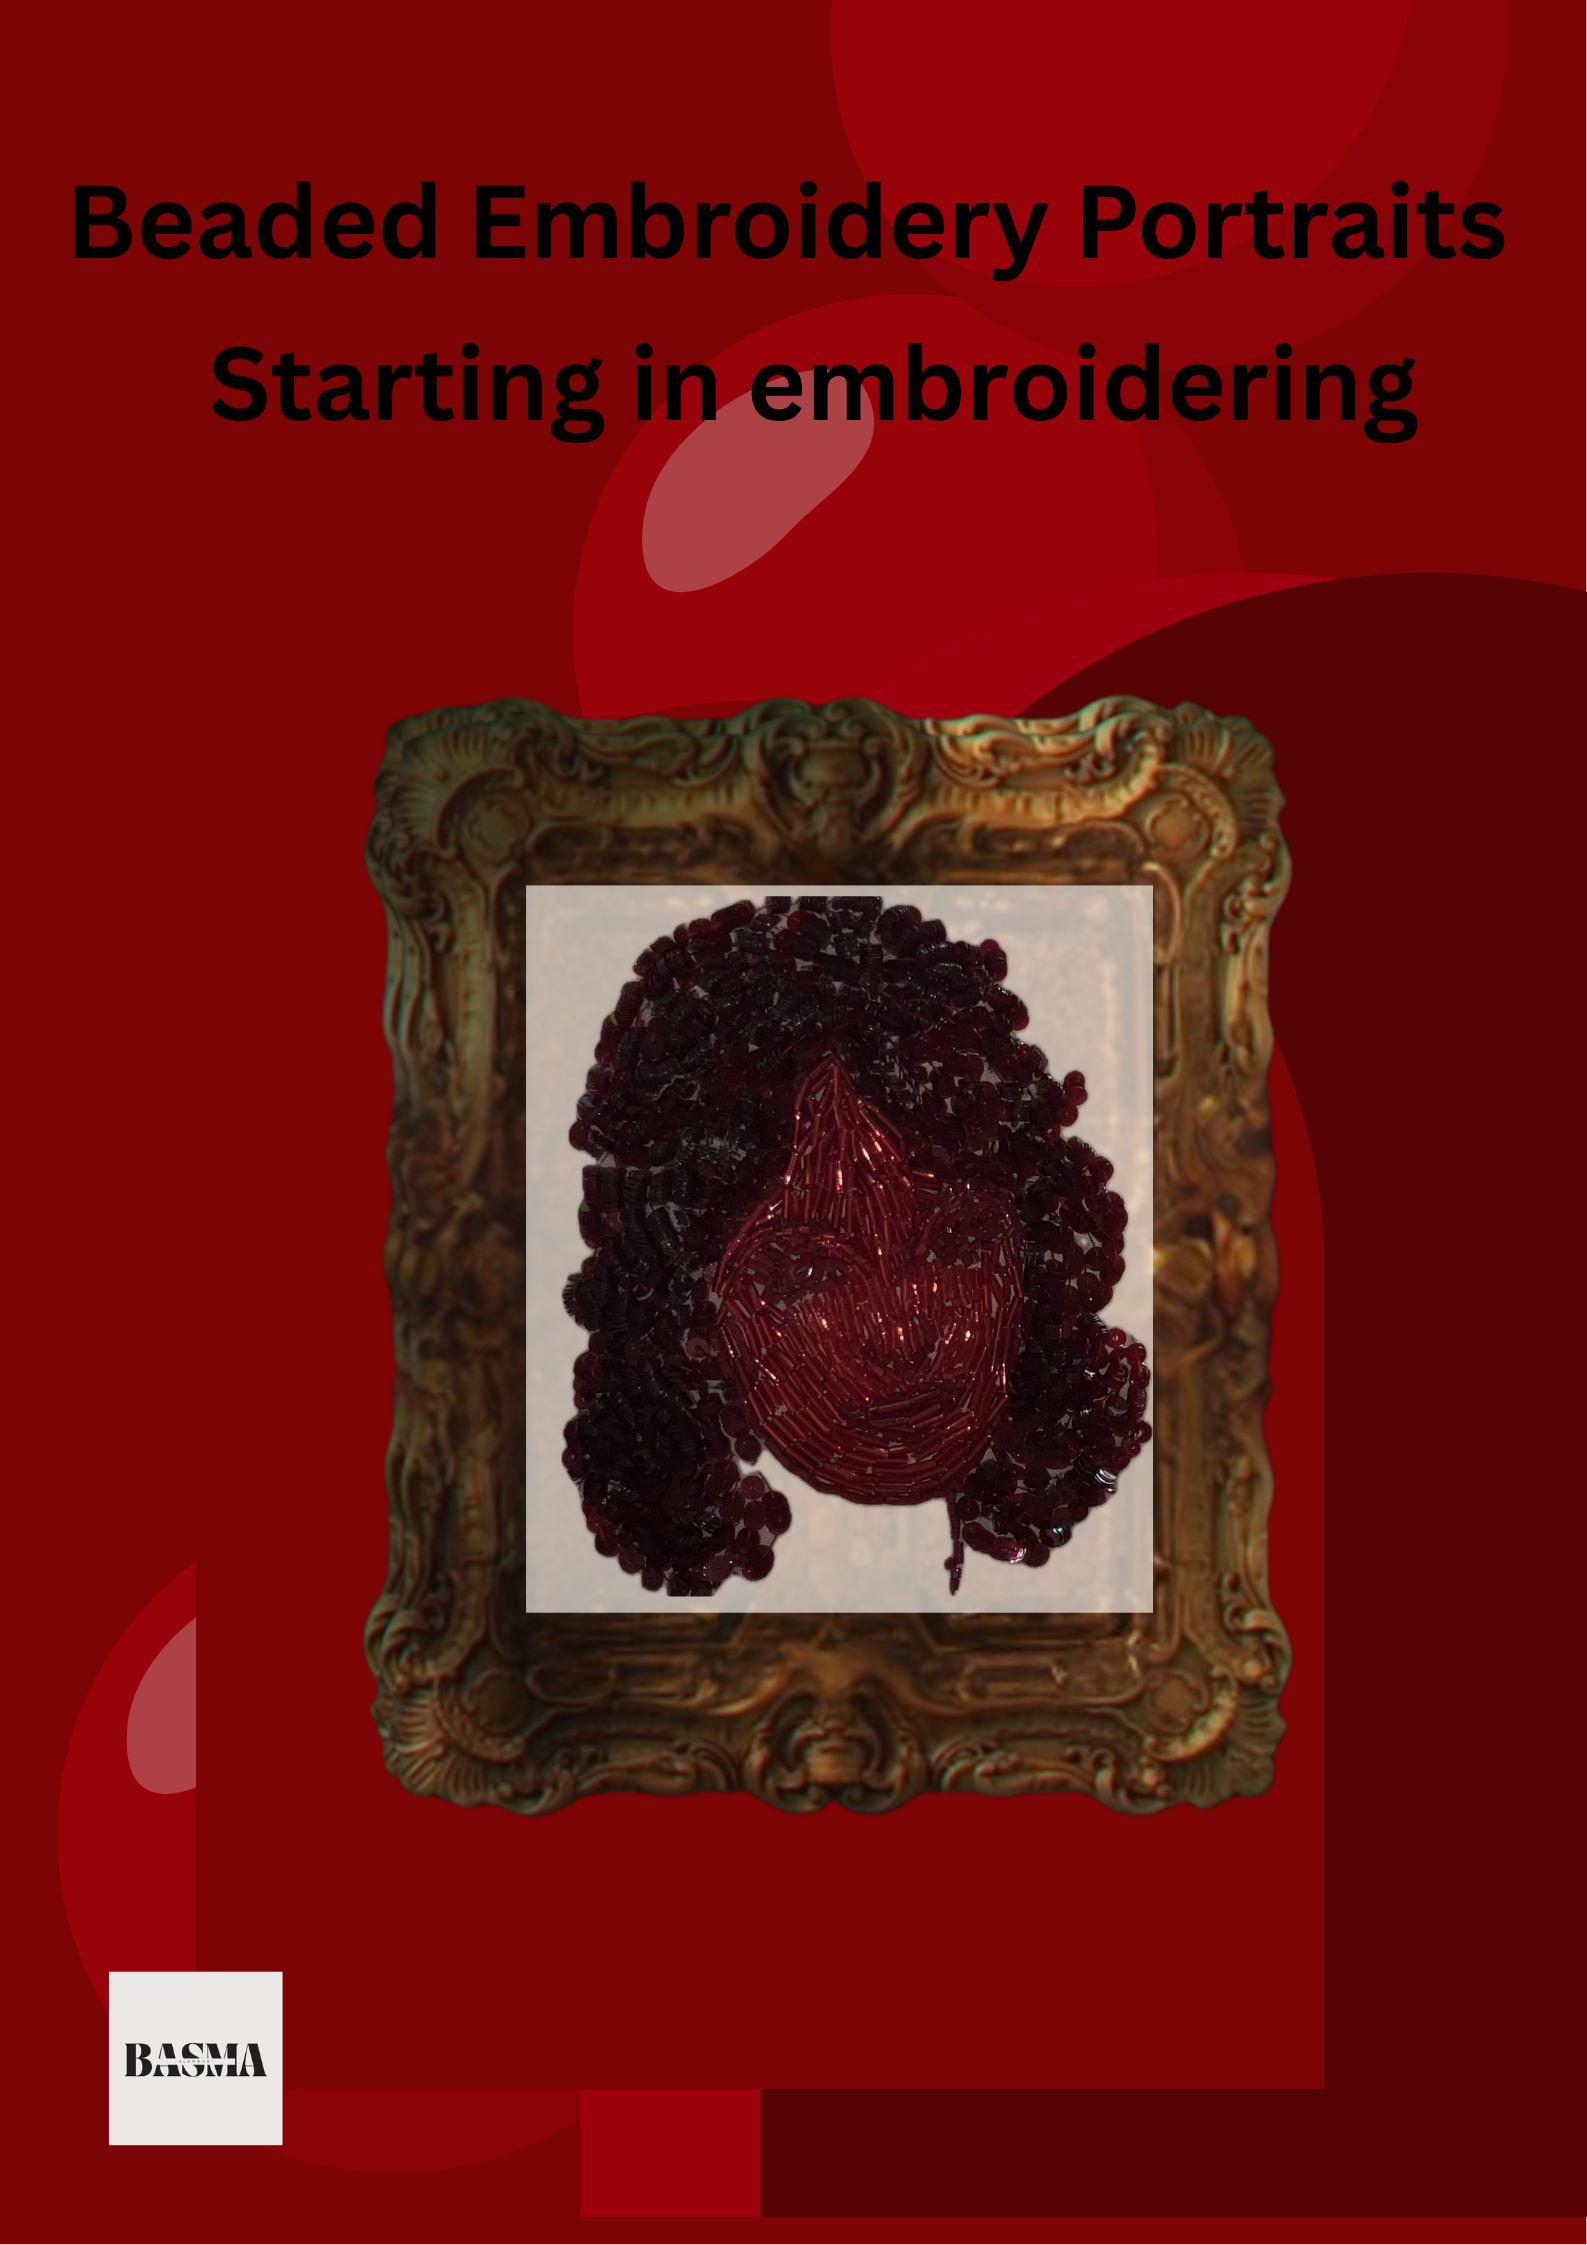
For my final project, I chose to create a beaded embroidery portrait titled The Old Artist, inspired by the iconic Arab singer and actress Shadia.
Unlike the course example inspired by Marilyn Monroe, I wanted to reinterpret an artistic icon from my own cultural background. The intention was not to analyze her history or symbolism, but rather to celebrate her presence as a timeless figure within Arab visual memory.
The core concept of this piece is monochromatic expression. I chose to work exclusively in shades of red, inspired by single-color photographic filters. The decision was purely aesthetic — I was drawn to the richness and emotional intensity that red tones can create when layered through beadwork.
Through variations in texture, light reflection, and tonal contrast, the portrait explores how depth and dimension can be achieved using a single color family. The result is an image that feels unified, bold, and visually immersive.
Supplies
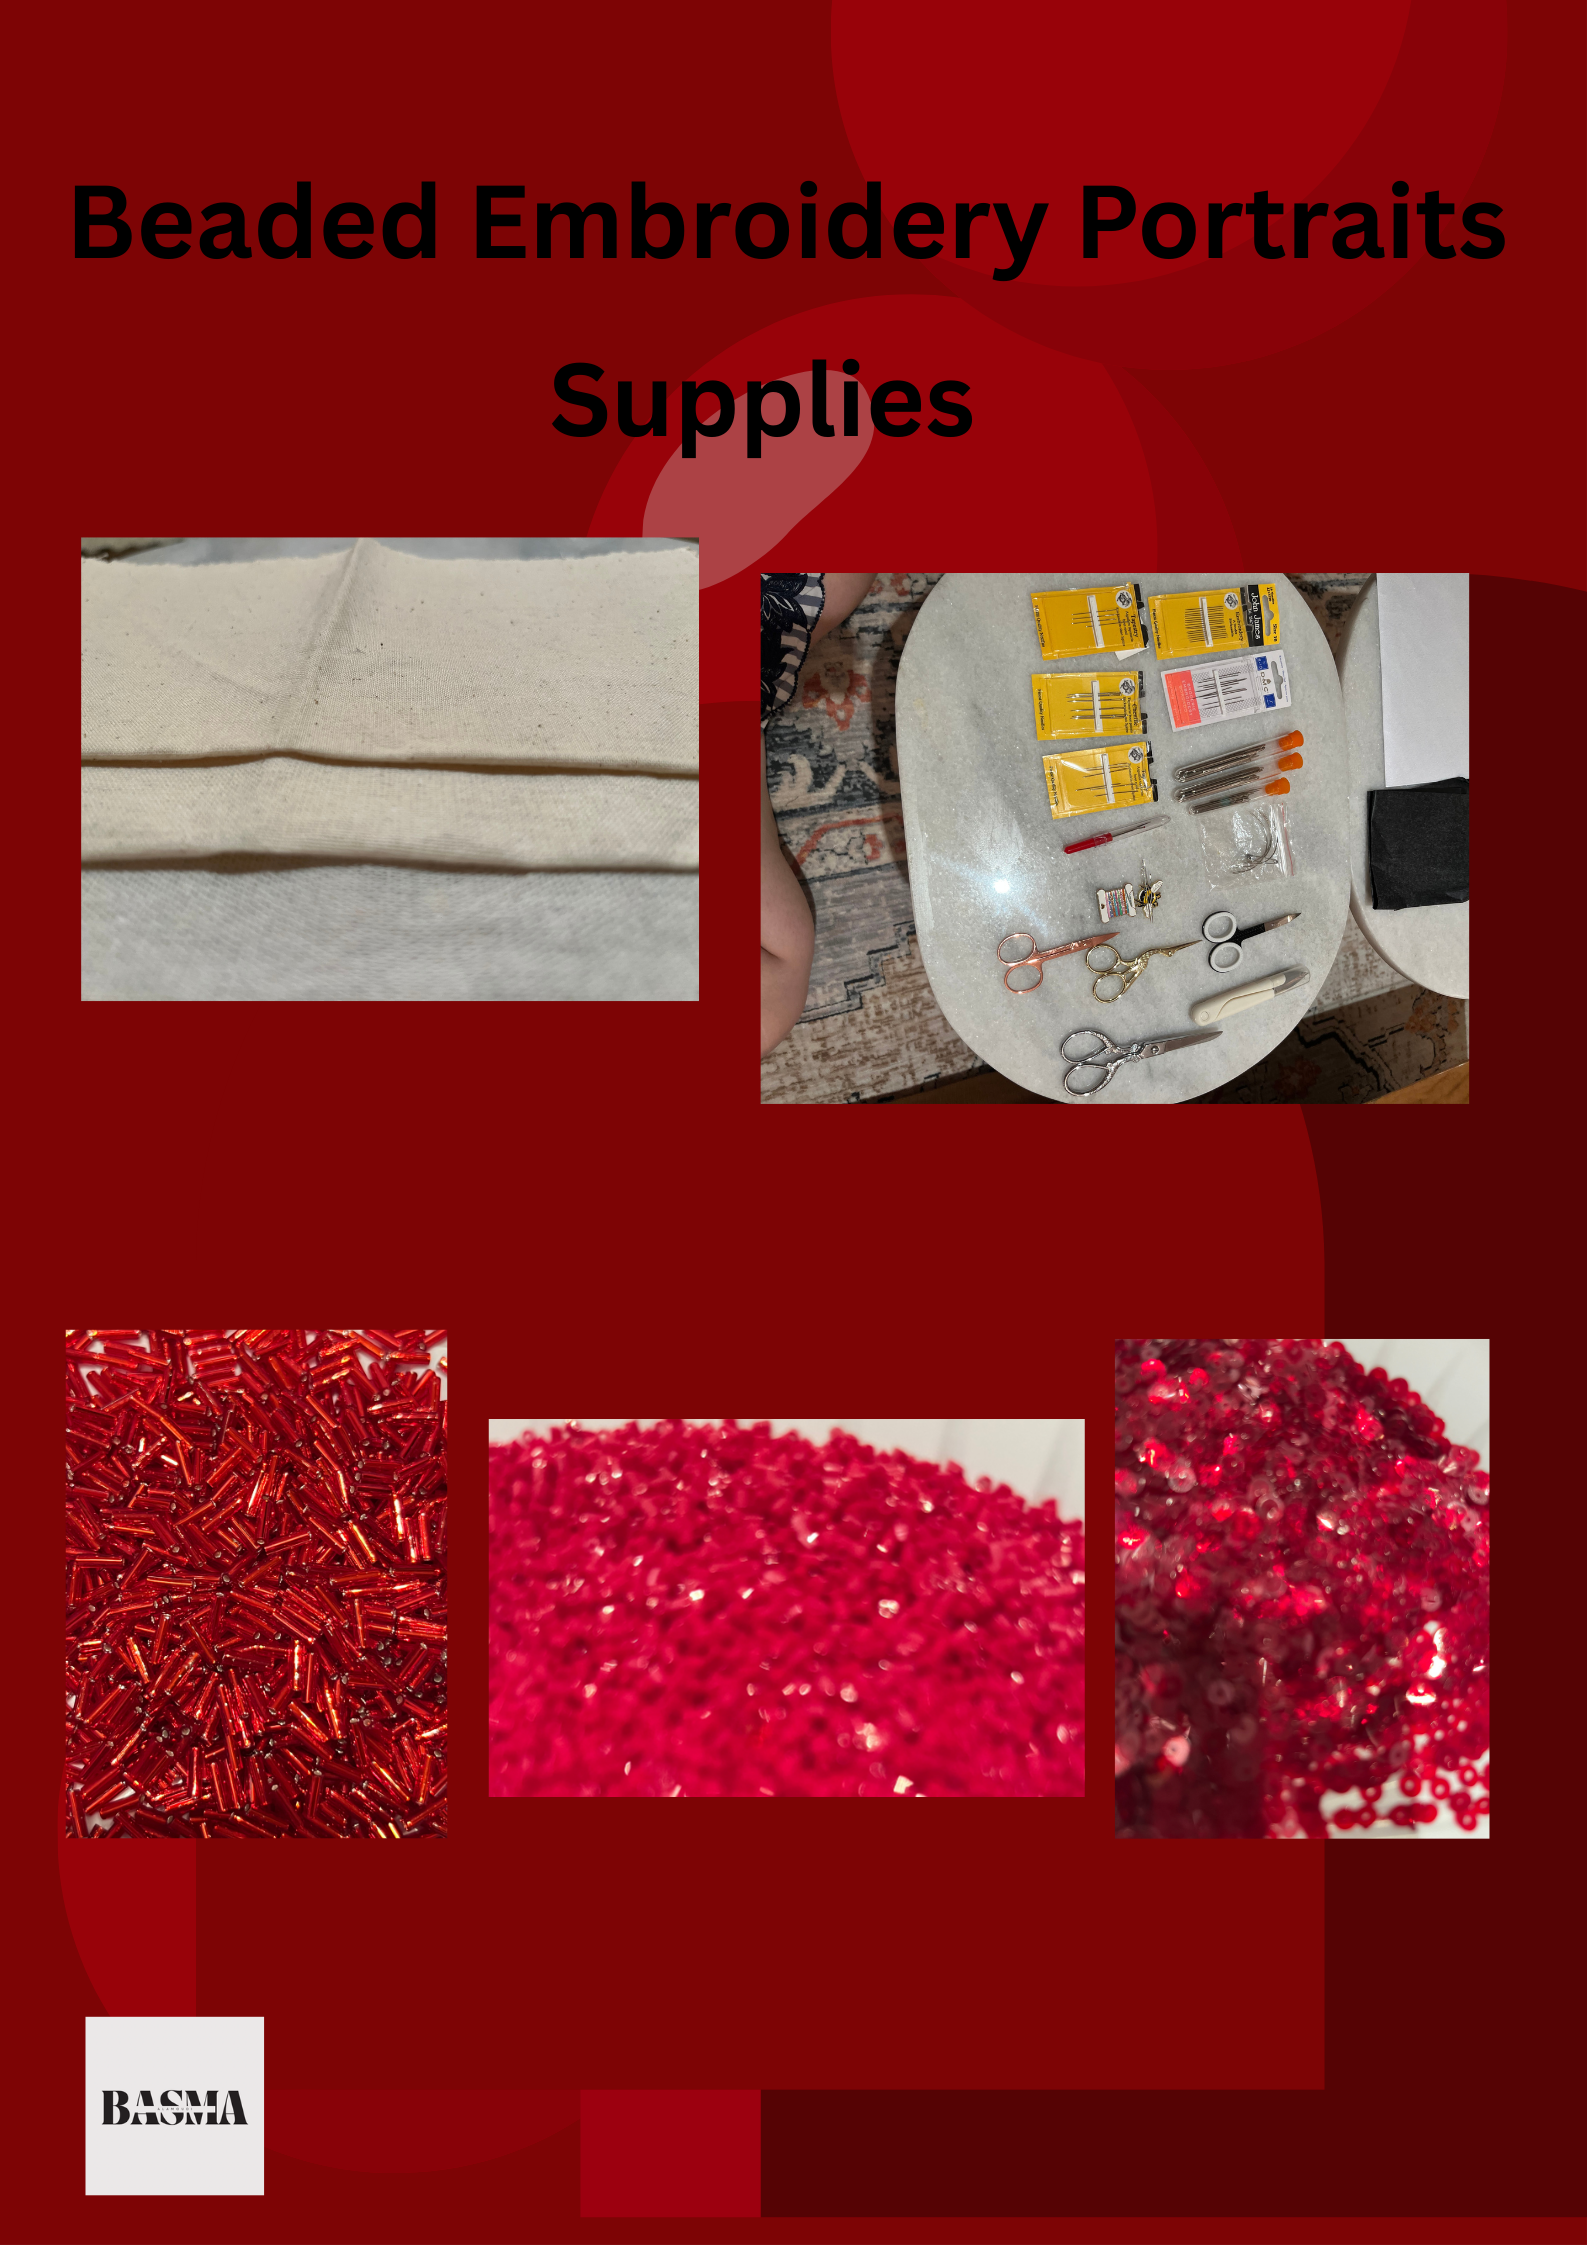
Fabric
• Calico fabric used as the base material for the portrait. Chosen for its stability and suitability for bead embroidery.
Beads
• A mixed selection of beads in various shapes and sizes.
• Different bead types were combined to create texture, tonal variation, and dimensional depth within the monochromatic red palette.
Needles & Threads
• Fine beading needles suitable for detailed work and small bead holes.
• Embroidery thread selected to match the red tonal range.
Transfer Method
• Water-soluble transfer paper used to accurately transfer the portrait design onto the fabric.
• The design disappears once exposed to water, leaving no visible markings.
Tools
• Embroidery hoop to maintain fabric tension during stitching.
• Magnetic needle holder for safety and convenience.
• Small embroidery scissors for precise thread cutting.
Choosing the Photo.
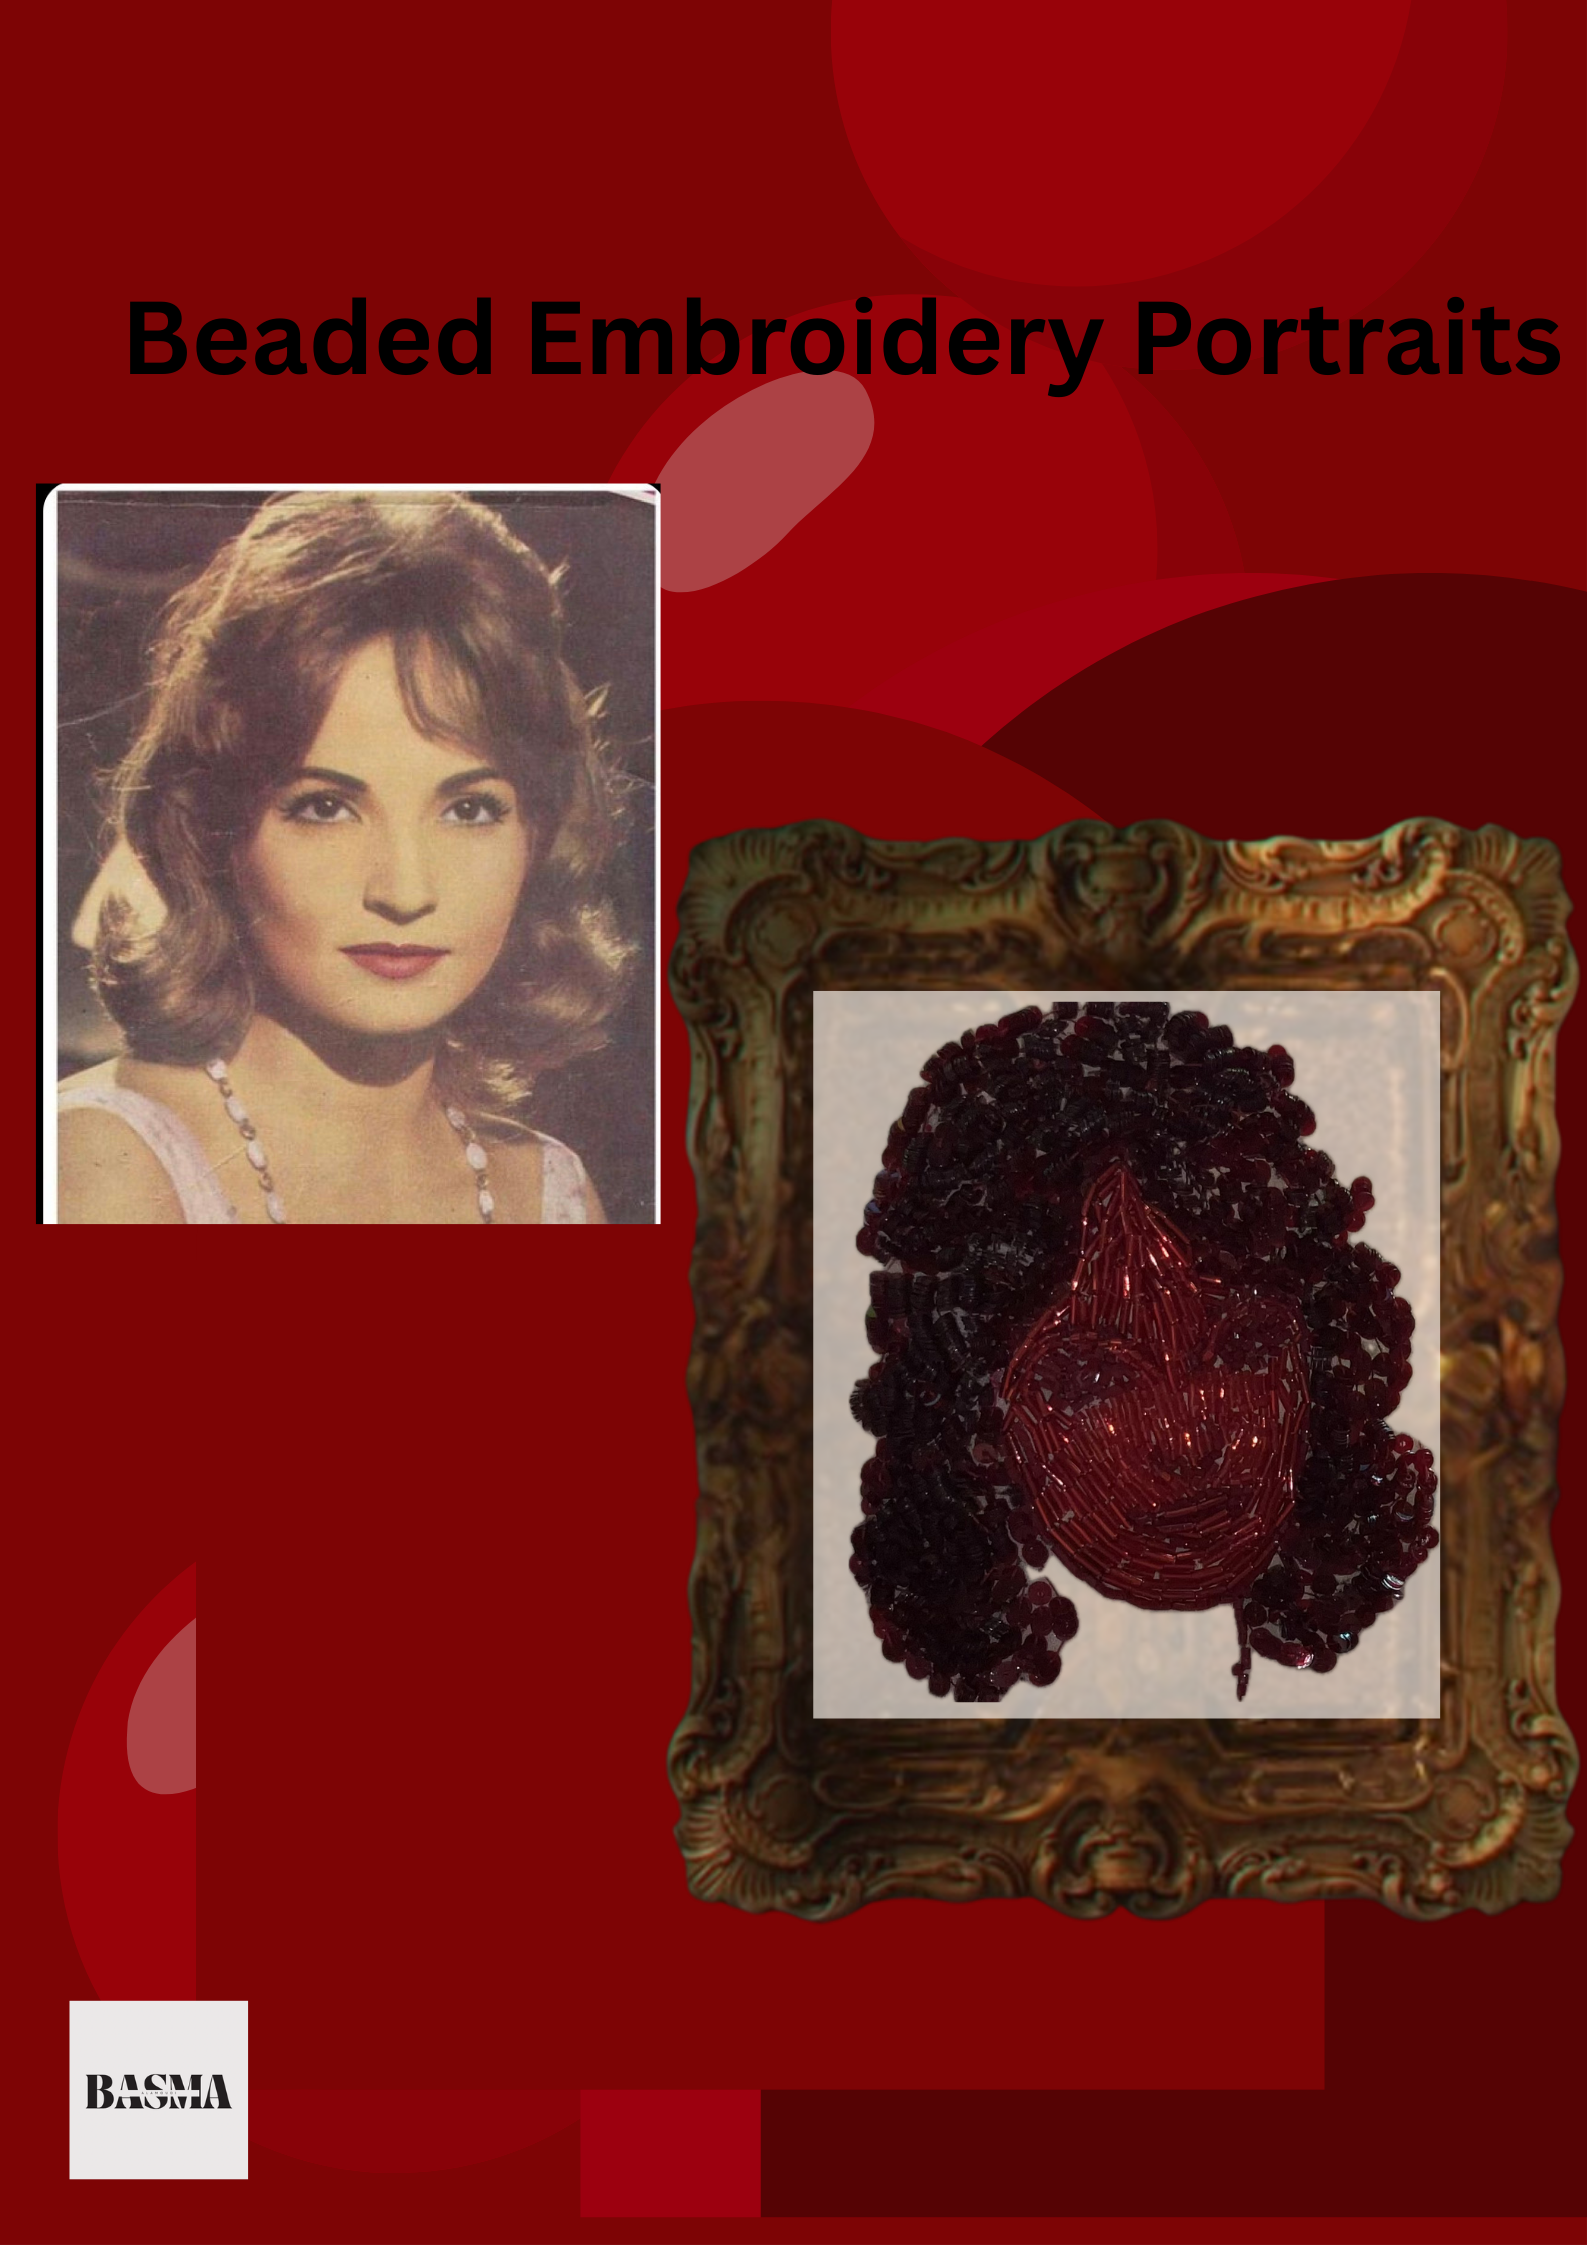
In this step, I searched the web and Pinterest for the perfect photo of Shadia that represented her faithfully and clearly. I then applied a red photographic filter to see how the image would look in a monochromatic red palette. After reviewing the result, I finalized the photo using Canva and prepared it for transfer onto the fabric.
Choosing the Beads
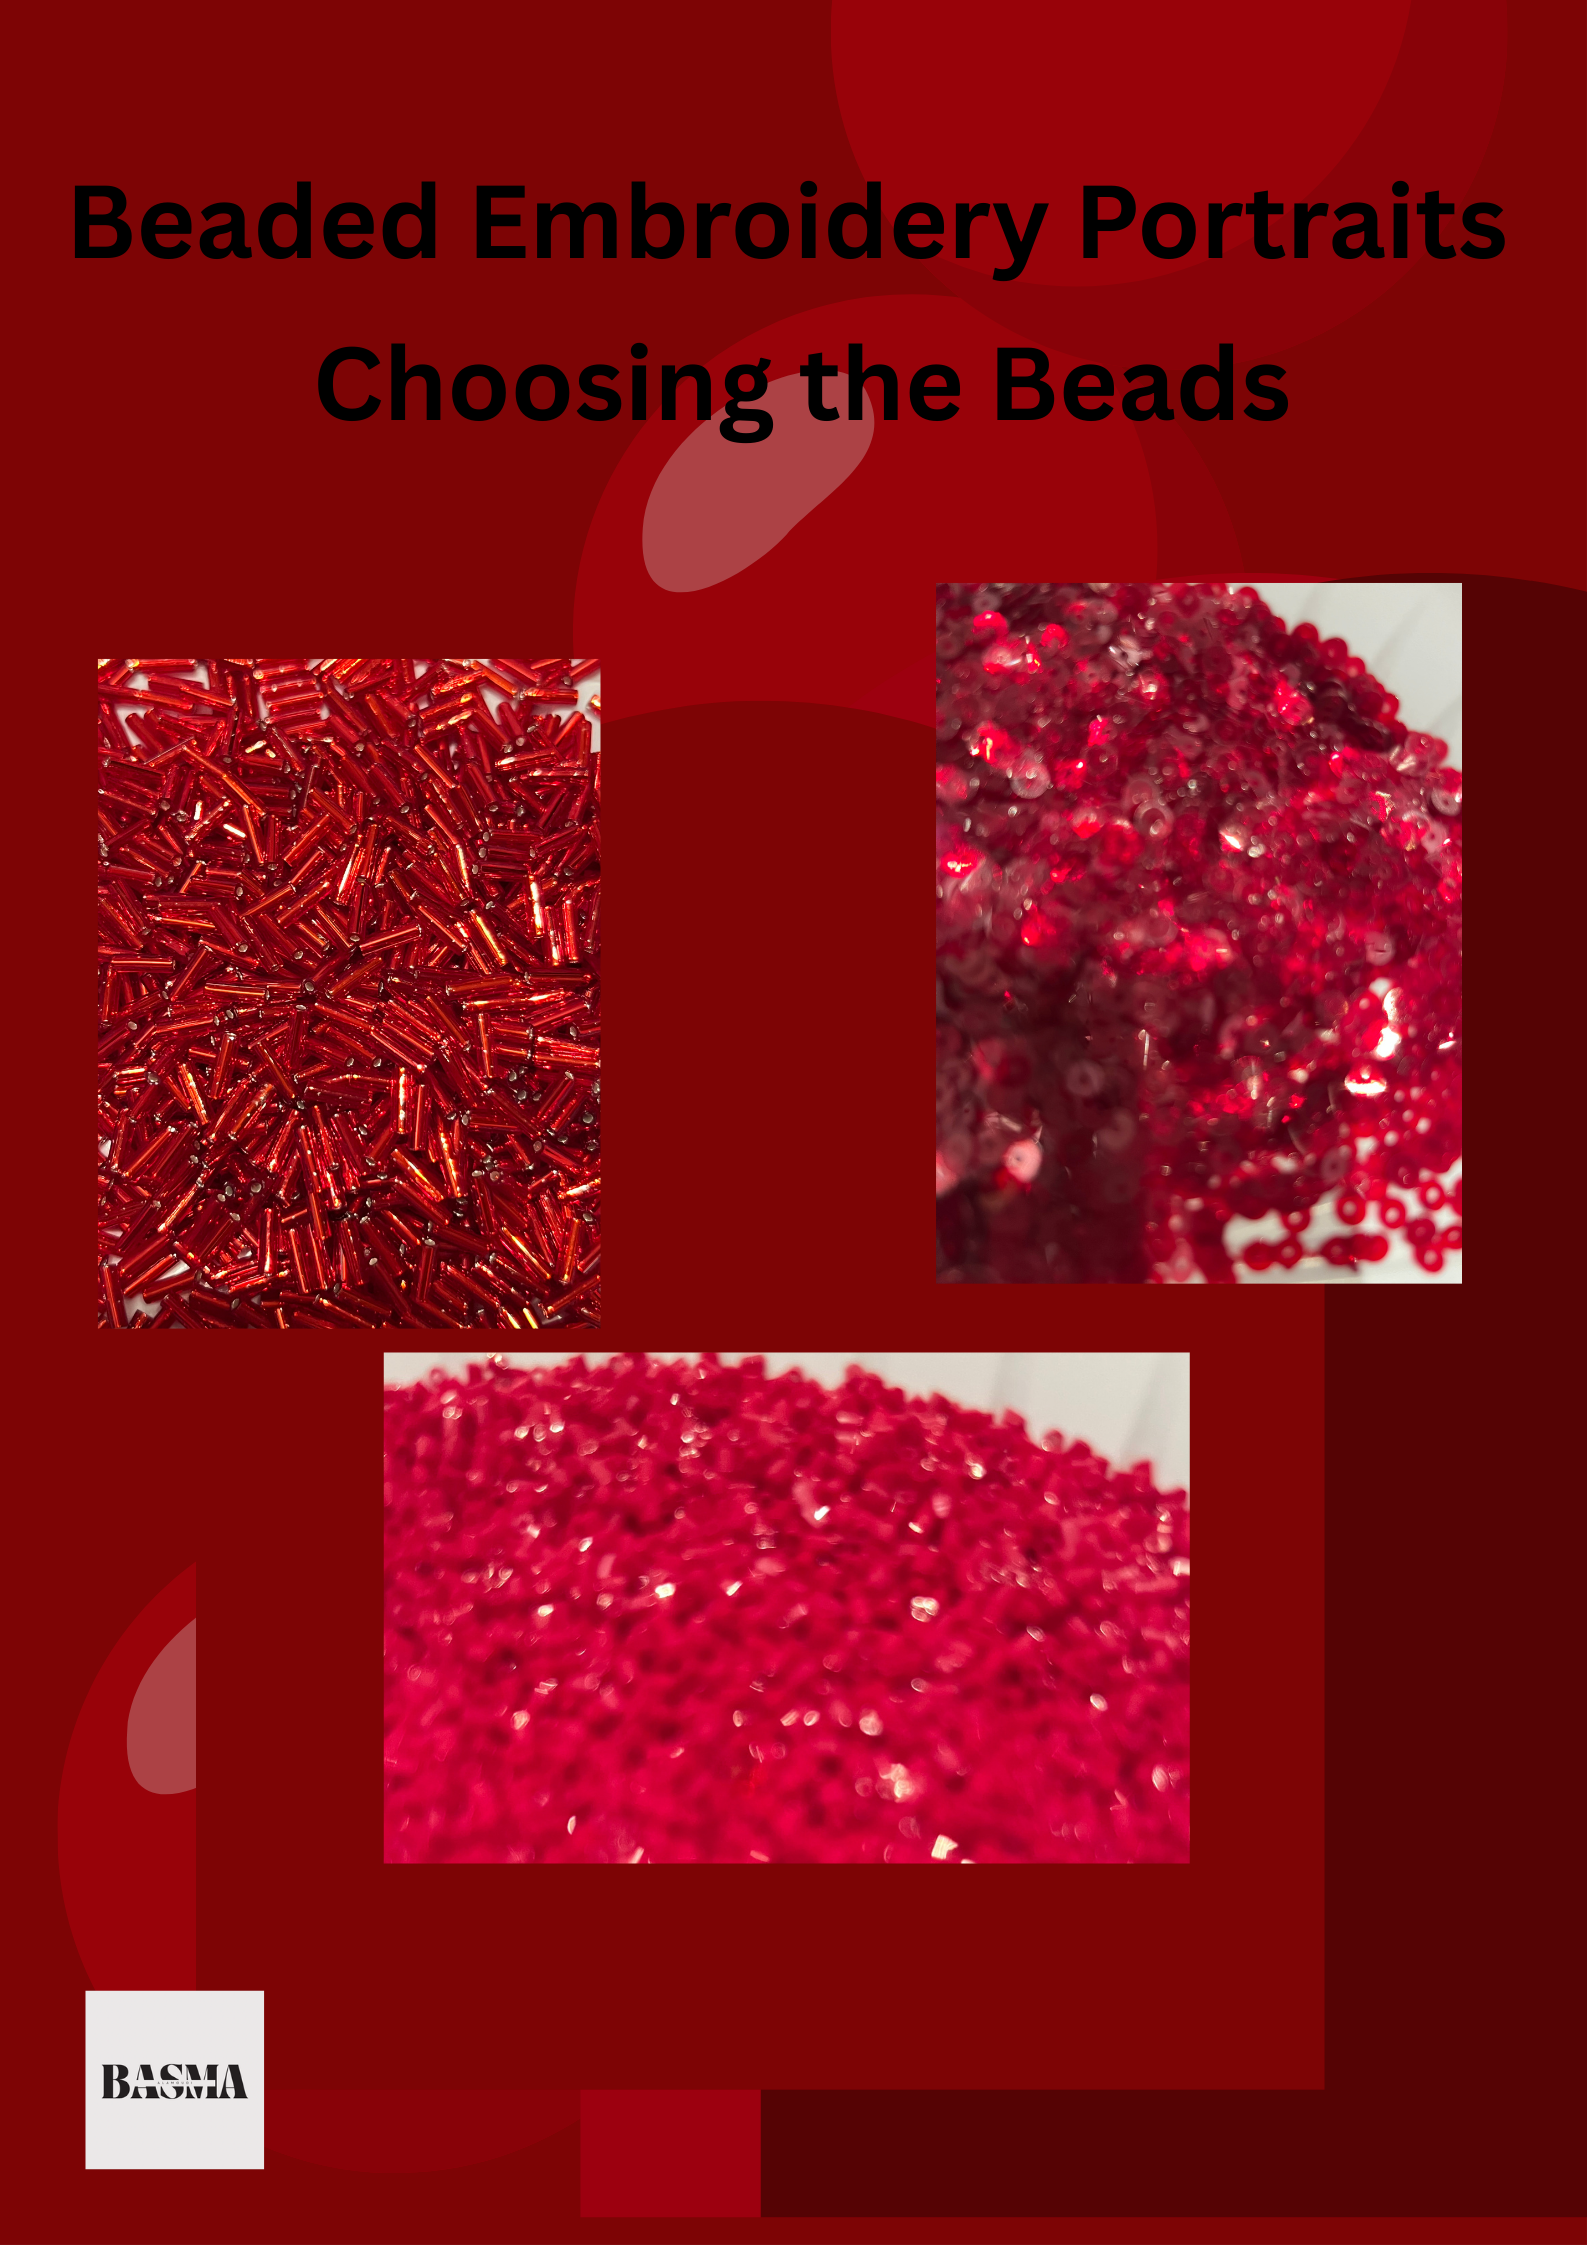
This step of the project took the most time because choosing different sizes and shapes of beads was not easy. Sometimes the desired shapes were not available in local stores or online, or the right needle was missing. It was a challenging process, but I learned a lot throughout it. Finally, I selected a variety of beads in different sizes and shapes, all in shades of red, to use consistently throughout the project.
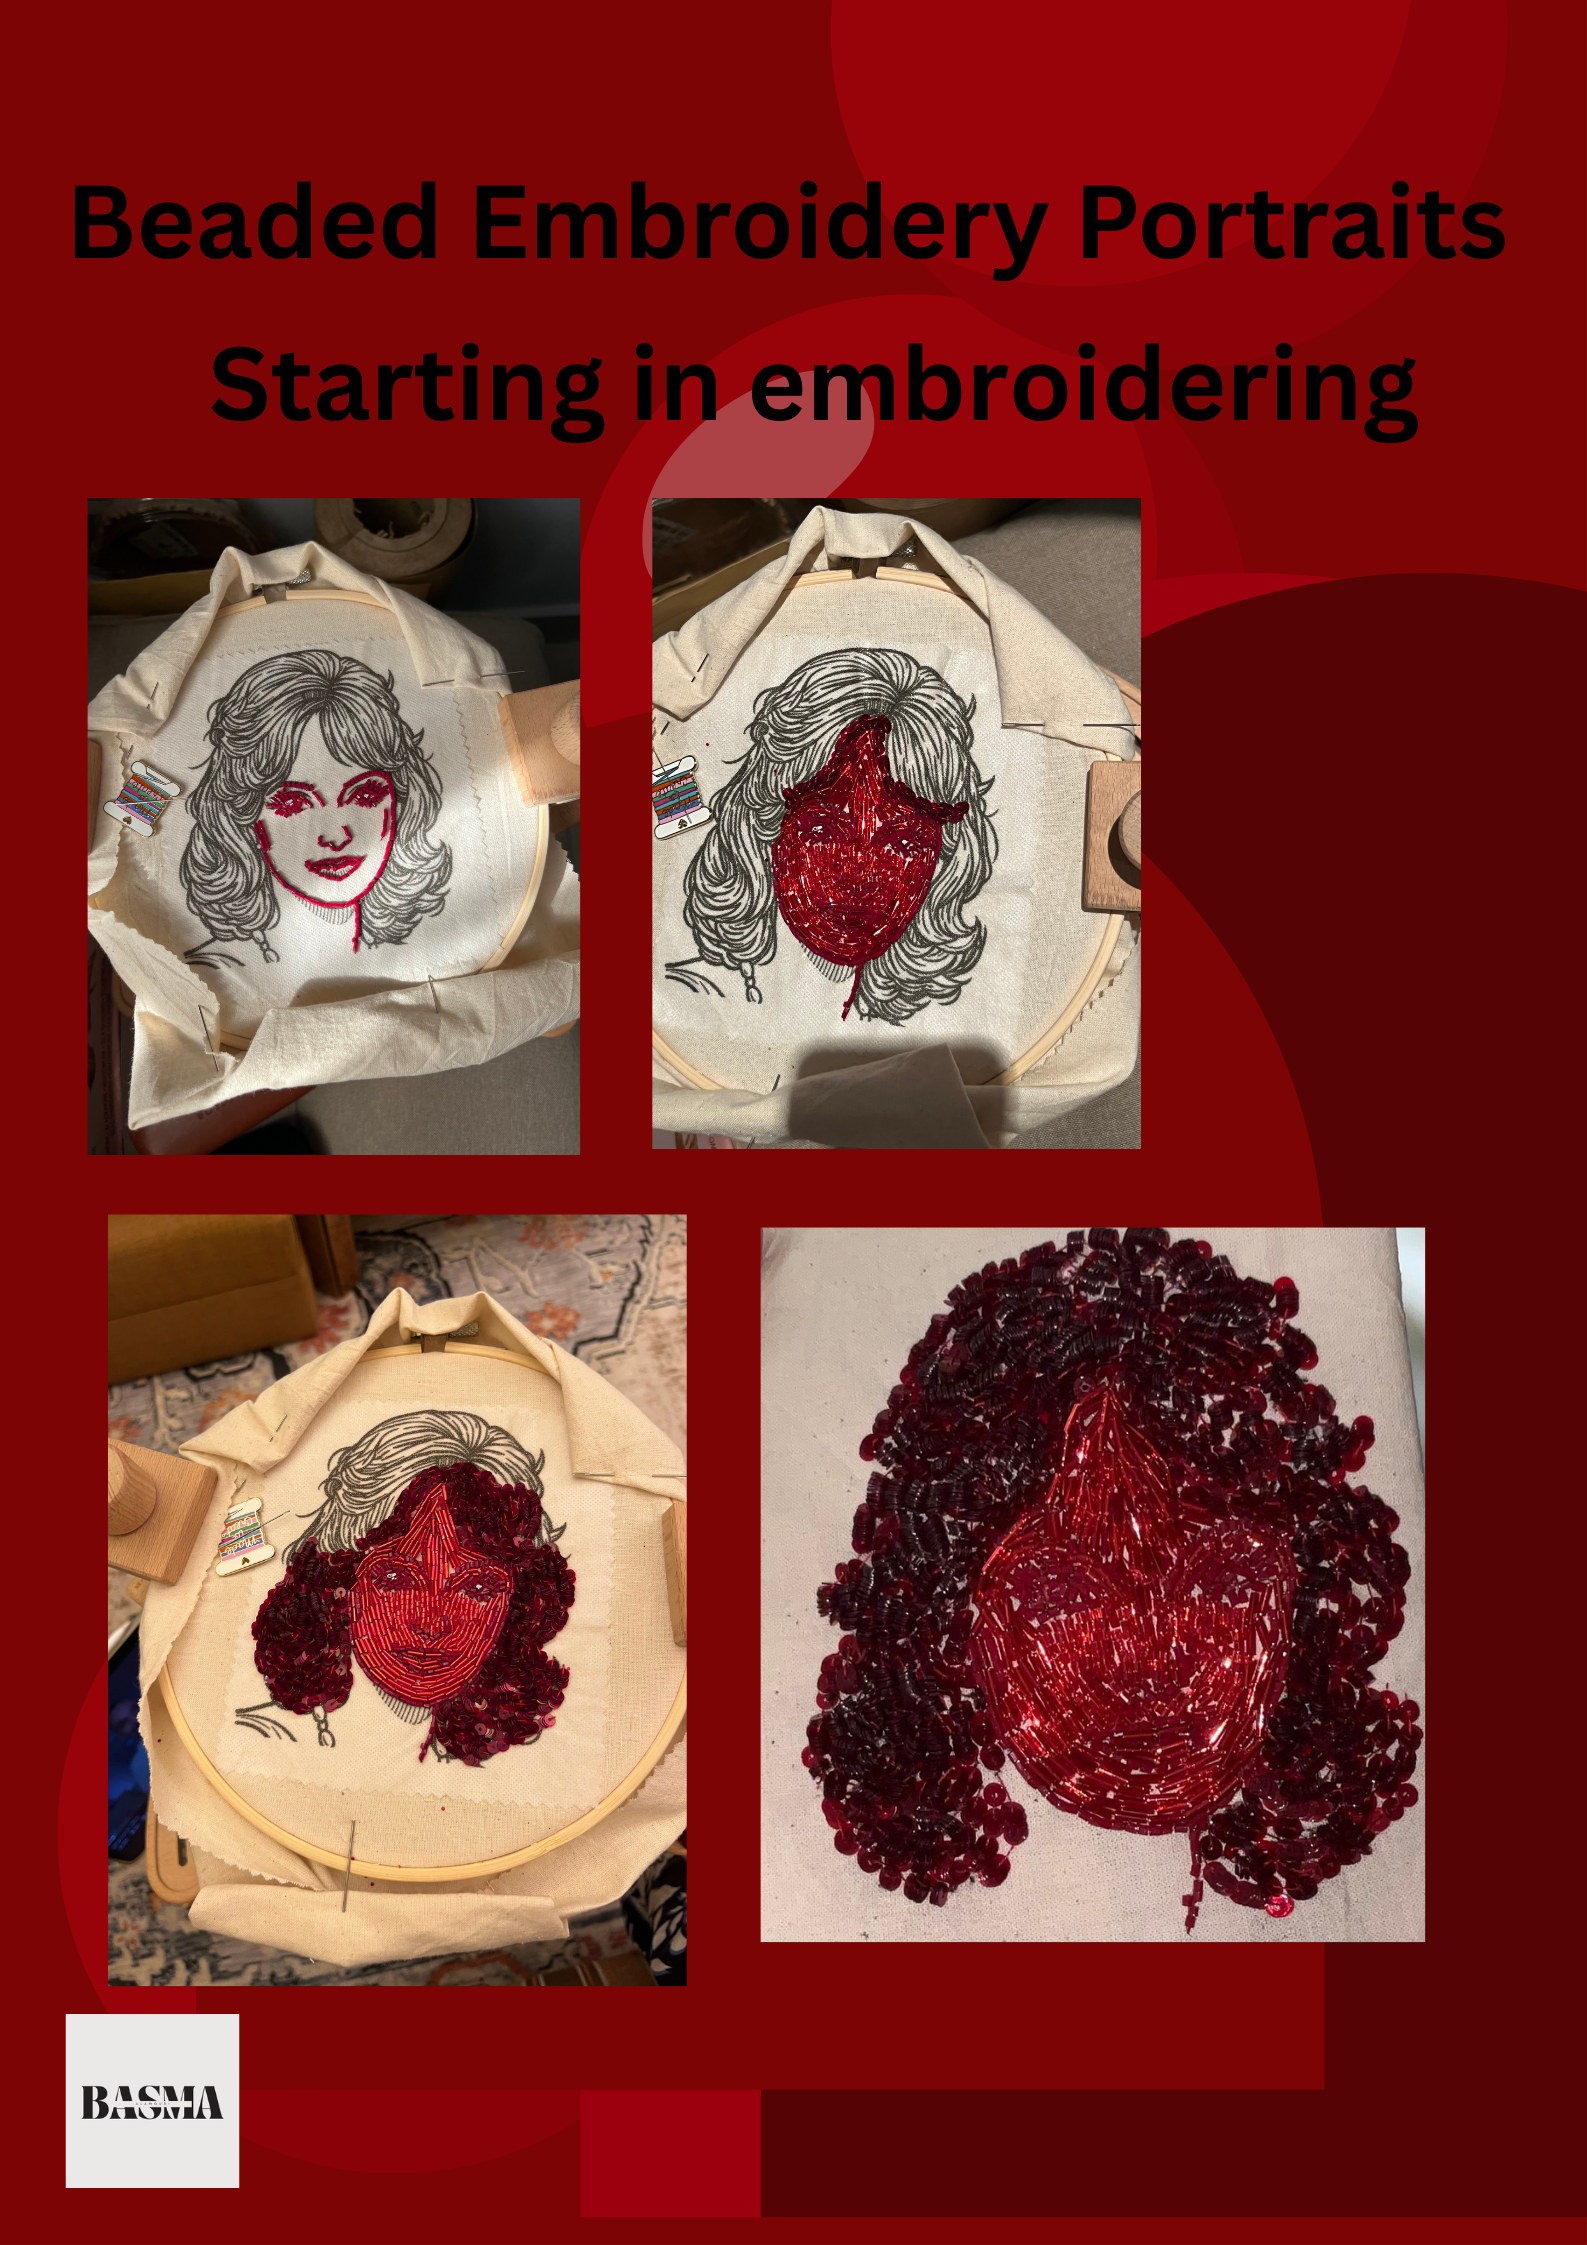
Starting in embroidering
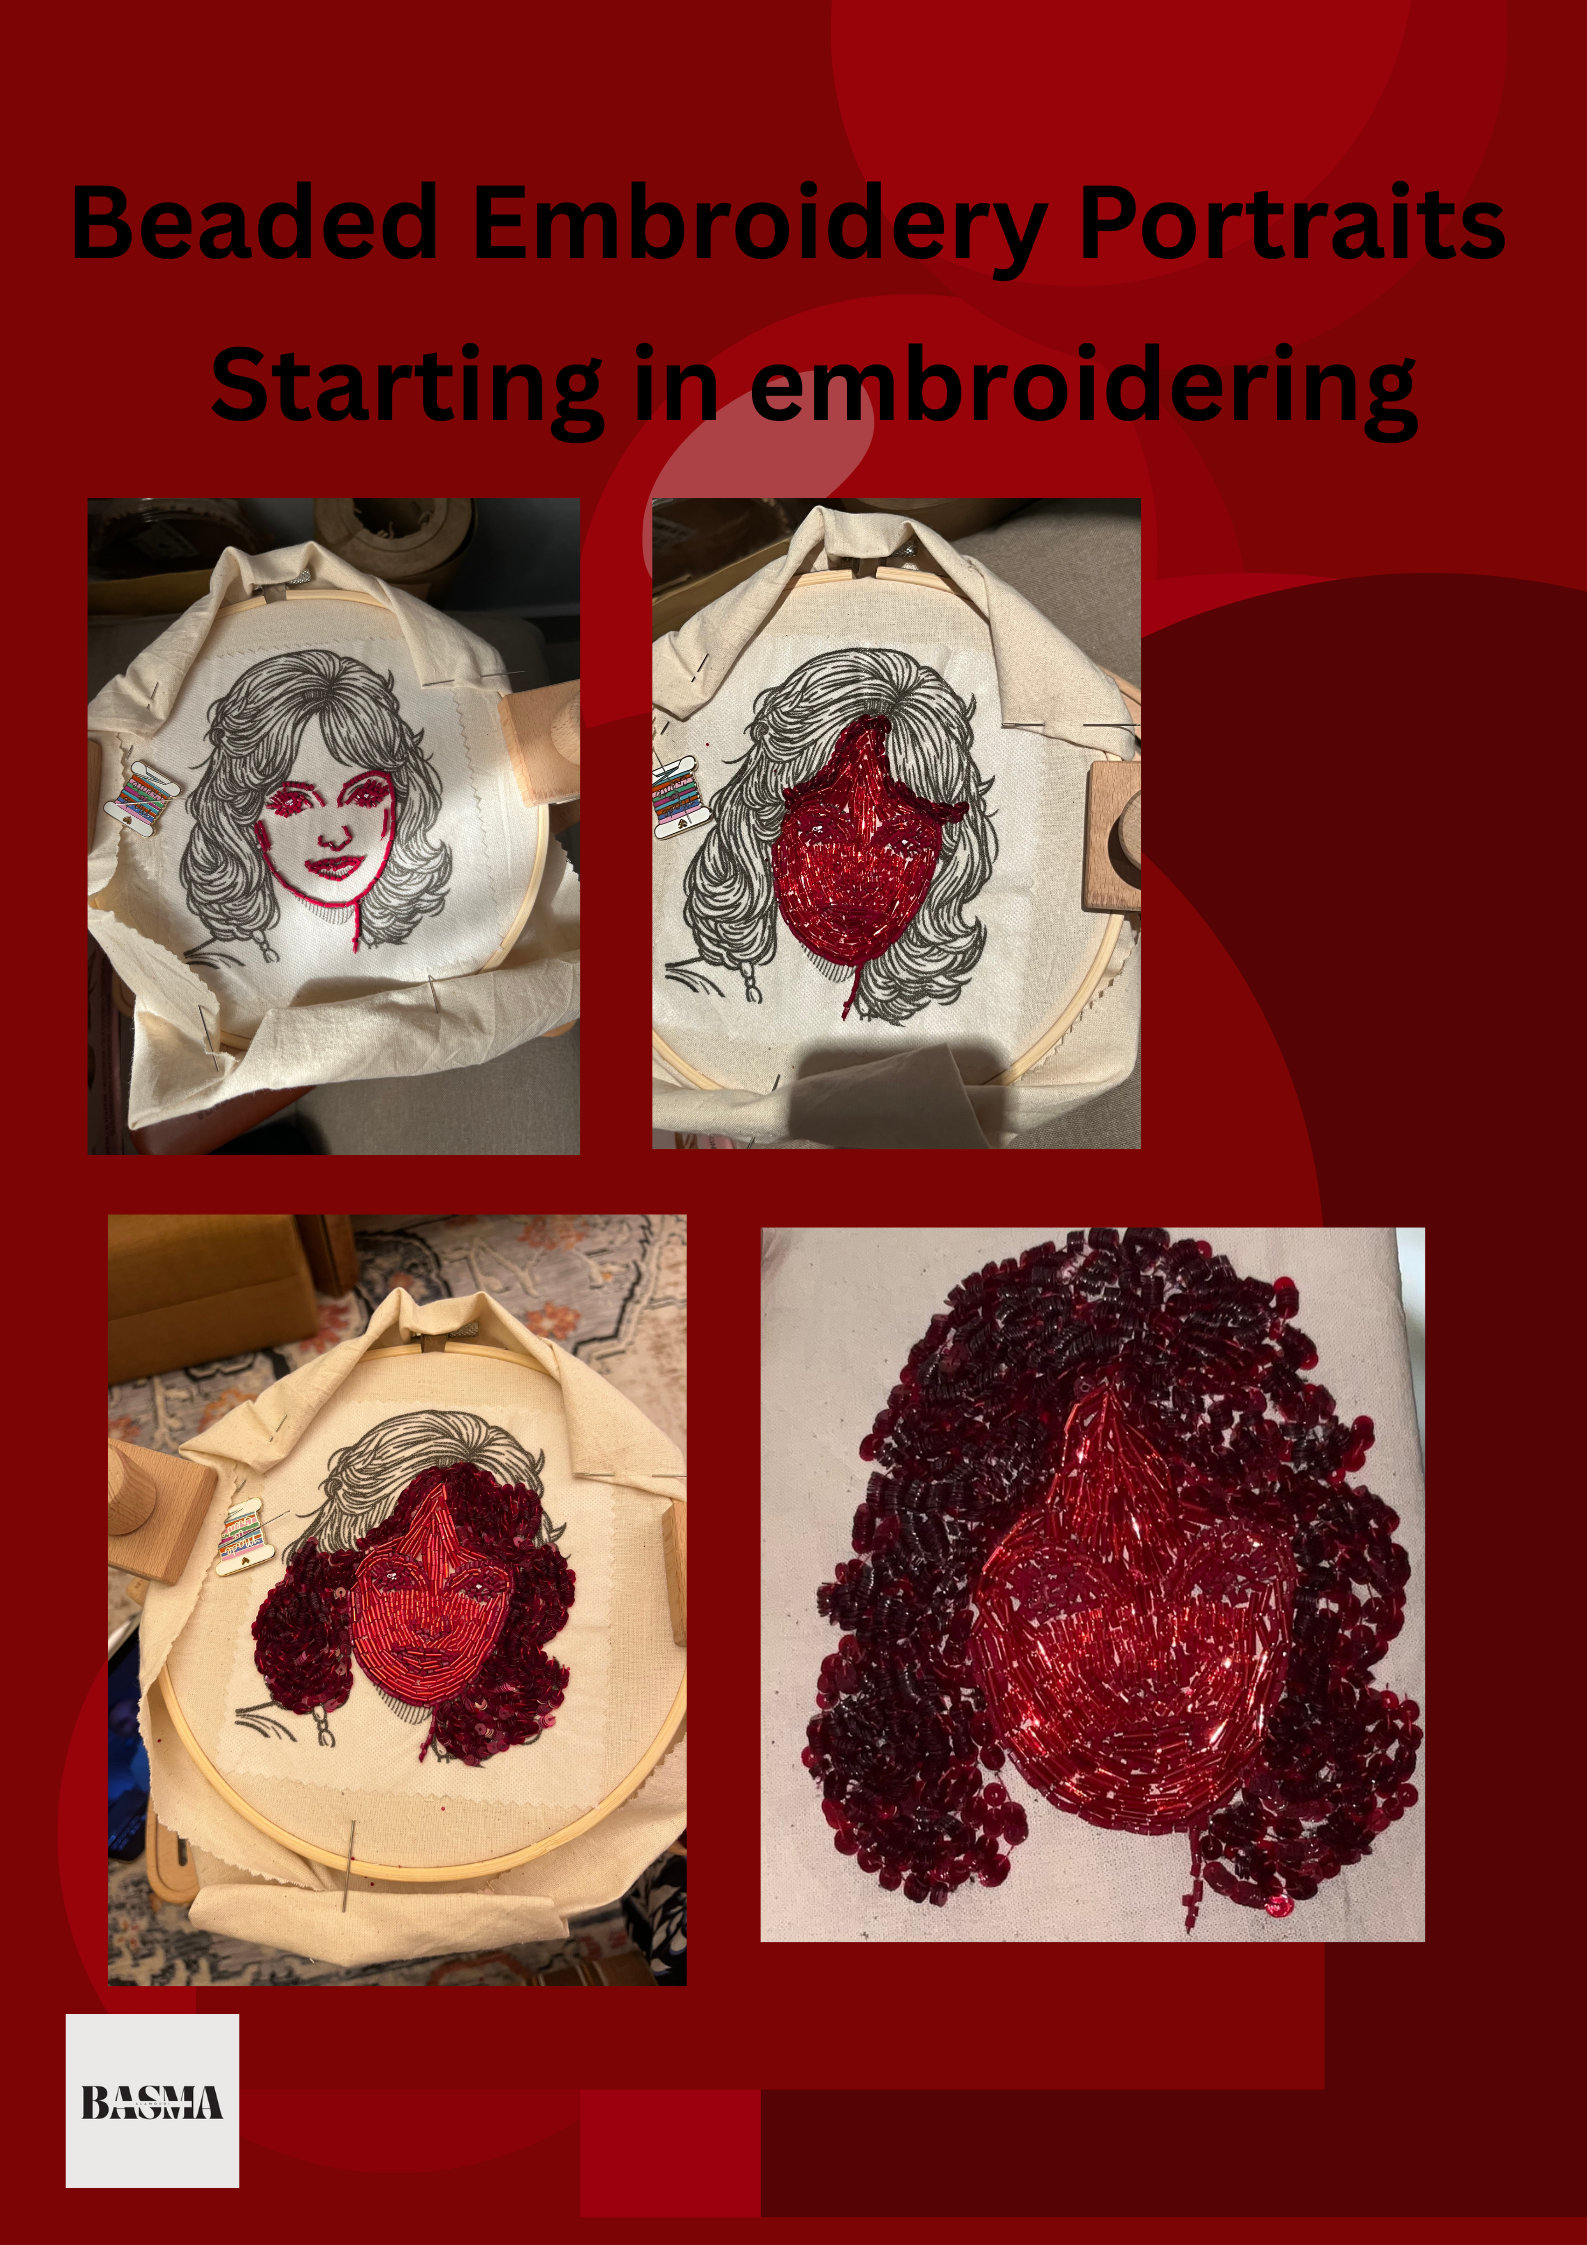
Now, with all the materials prepared, I began the embroidery. I focused on choosing the right techniques and stitches for the different shapes and sizes of beads. This step was a learning process, figuring out how to use beads of various sizes effectively in different areas of the piece. The result of applying these techniques was very exciting and satisfying.
The final piece
The photo shows the completed piece. However, unlike the example in the course, I decided not to finish it exactly the same way. Instead, I chose to present it in a frame.


0 comments
Log in or join for Free to comment