Stamp Making with Typography and Imagery
A course by Maria López, Artist and Engraver

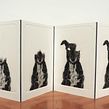

Learn rubber-engraving techniques to create personalized stamps that combine letters and images
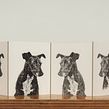

With a customized stamp, you can print anything, from your initials to a portrait of your pet. The only limit is your own imagination. In this online course, María López, whose work has been exhibited in Colombia, Spain, the US, and Japan, teaches you how to create your own personalized stamps.
Discover the secrets behind rubber carving, combining letters and images to bring to life a unique Ex Libris that conveys your personal style.
What will you learn in this online course?
18 lessons & 27 downloads
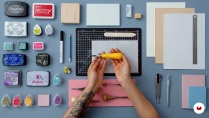
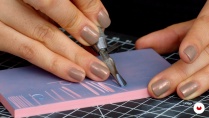
What's included in this course?
Begin by getting to know María López as she talks about her journey as an artist and where she gets her inspiration.
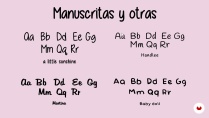
After going over the materials you need, immerse yourself in the carving technique. Learn how to work with gouges and stamping materials, as well as how to prep the rubber for carving. María then gives you some tips on carving letters and choosing the typography for your stamp.
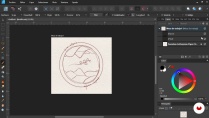
Next, discover what an Ex Libris is and move on to define the idea for your final project. Illustrate your stamp in a range of compositions, and delve a little deeper into the circular structure by learning to curve the text using a simple method.
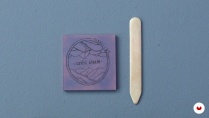
Now for the exciting part! Your teacher shows you two ways to transfer your design to the rubber, before it's time to get carving following María's steps. Once you've finished, test your stamp with different inks on a variety of surfaces. To wrap things up, attach your stamp to a wooden block for a professional finish with a personal feel.
- 99% positive reviews (135)
- 8,216 students
- 18 lessons (3h 25m)
- 27 additional resources (10 files)
- Online and at your own pace
- Available on the app
- Audio: Spanish, English, French, Indonesian, Italian, Portuguese, Romanian, Turkish
- Spanish · English · Portuguese · German · French · Italian · Polish · Dutch · Turkish · Indonesian · Romanian
- Level: Beginner
- Unlimited access forever
What is this course's project?
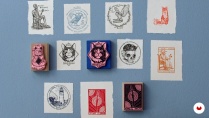
Create an Ex Libris, a personalized stamp including letters and images that you can use to mark your books.

Projects by course students


Who is this online course for?
Anyone interested in creating their own stamp.
Requirements and materials
No previous experience is necessary to take this course.
For materials, you need linoleum gouges, rubber for carving, a craft knife, ink pads, a pencil and paper, or a design software like Canva or Photoshop.

Reviews

Maria López
A course by Maria López
María López is a professional artist and engraver from Colombia. Her work has been exhibited in museums and galleries in Colombia, Spain, the US, and Japan.
Over the years, she has come to specialize in customized stamps. Through this medium, she creates pet portraits, logos, decorative motifs, and typography for clients looking to make their products stand out with original branding elements. She also expresses her creativity through etching and metal engraving.
Content
-
U1
Introduction
-
Presentation
-
Influences
-
-
U2
Preparation: technique and materials
-
The materials
-
The basics of carving technique
-
Typefaces and exploration of letter carving
-
-
U3
Inspiration and project design
-
The idea, the inspiration and the bookplate
-
Create drawing 1
-
Create drawing 2
-
Types of composition: the general structure of the stamp
-
Circular composition: how to curve the text
-
-
U4
Making of the seal
-
Transfer the design to the rubber
-
Carve seal 1
-
Carve seal 2
-
Proofing and stamping
-
The final touches
-
Stamp the book
-
-
U5
Seal care and recommendations
-
Preservation of seal and tools
-
Other uses for the stamp
-
-
FP
Final project
-
Stamp Making with Typography and Imagery
-
What to expect from a Domestika course
-
Learn at your own pace
Enjoy learning from home without a set schedule and with an easy-to-follow method. You set your own pace.
-
Learn from the best professionals
Learn valuable methods and techniques explained by top experts in the creative sector.
-
Meet expert teachers
Each expert teaches what they do best, with clear guidelines, true passion, and professional insight in every lesson.
-
Certificates
PlusIf you're a Plus member, get a custom certificate signed by your teacher for every course. Share it on your portfolio, social media, or wherever you like.
-
Get front-row seats
Videos of the highest quality, so you don't miss a single detail. With unlimited access, you can watch them as many times as you need to perfect your technique.
-
Share knowledge and ideas
Ask questions, request feedback, or offer solutions. Share your learning experience with other students in the community who are as passionate about creativity as you are.
-
Connect with a global creative community
The community is home to millions of people from around the world who are curious and passionate about exploring and expressing their creativity.
-
Watch professionally produced courses
Domestika curates its teacher roster and produces every course in-house to ensure a high-quality online learning experience.
FAQs
You’ll learn how to design, carve, and mount custom rubber stamps, blend traditional and digital techniques, and apply stamping methods on various surfaces—including making bookplates and using specialized tools.
The course is geared toward people with intermediate art or design skills, but it also covers basics for those with some knowledge who want to refine their craft.
You’ll need rubber blocks, carving tools like Speedball gouges, stamp inks, handmade paper, adhesives, mounting materials, and access to digital design software like Affinity Designer or Procreate.
Yes, the course guides you step-by-step through designing, carving, and stamping personalized bookplates, including how to choose the right spot in books and techniques for consistent, lasting prints.
The course covers basic metal engraving and etching concepts as historical and comparative context, but mainly focuses on rubber stamp making and accessible hand techniques.
Programs like Affinity Designer and Procreate are used for digital sketching, typography manipulation, and prepping files to transfer designs onto rubber.
Yes, the course teaches specific techniques for carving small letters and fine details, including proper gouge use, pressure control, and ways to improve design clarity and precision.

Excelente curso. Muy recomendado.
I learned a variety of techniques. I really enjoyed the course!
La Maestra María López es una figura excepcional en el grabado y la estampa, cuya grandeza reside en la unión de una técnica impecable y una sencillez profunda que trasciende lo humano. Su obra no es solo un proceso mecánico, sino un ritual magnánimo donde la huella y el espacio negativo revelan una belleza inefable.
One of my favorite teachers and courses.
Un curso muy bien explicado.